


What Most Riders Are Struggling With…
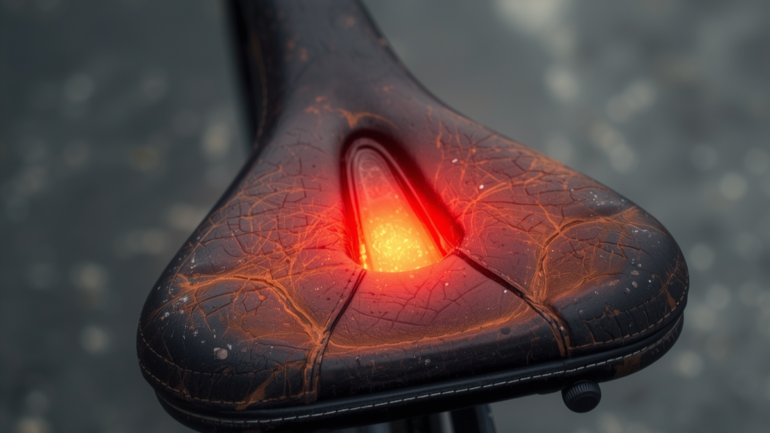
By far and away one of the most common discomforts that riders suffer unnecessarily on a bicycle is, in some way shape or form, discomfort related to their interaction with the saddle.
Finding a comfortable saddle can feel like a lifetime’s journey for some riders, and to say that it’s an important element of your bike fit to get right would be a gross understatement.
- Why then, is it so difficult for some riders to find a comfortable contact on their saddle?
- With a plethora of different saddle options on the market these days, surely there’s a saddle out there for everyone?
- But what happens when you’ve tried a load of different saddles, and nothing seems to work?
- How can finding a comfortable saddle be so difficult?
This is where we may need to look beyond the saddle itself to find the answers…
The 10 Pillars of Bike Fit
Those of you who’ve been following our regular programming via our podcast, or have attended one of our in-person workshops may be familiar with our 10 pillars of bike fit.
For those that aren’t familiar, this is a neat way of describing how we go through our bike fit process. By going through each of the 10 core elements that can affect your bike position in an orderly fashion, we can gain an understanding of the consequences that each adjustment has to the rest of the position, and end up with a good position that allows the rider to create and apply force through the pedals in a stable as sustainable way, relative to their riding goals.
The reason I mention our bike fit process is because it nearly always follows the same pattern, or is tested / adjusted almost always in the same order.
Why is this relevant?
Because, unless we can see that something is wildly and obviously wrong, saddles are pretty much the last thing we test. Why? Because if any other element of your bike fit is off, then regardless of what saddle you’re riding, it might not feel as good as it could do. I’ll give you an example…
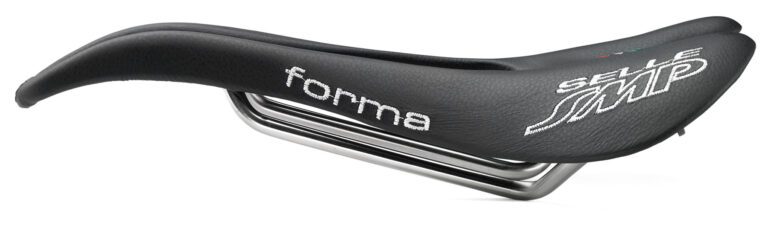
We’re constantly testing different saddles, as we’re extremely lucky to have access to 100+ different options in our studio. Regardless of what we test however, we all have our favourites that we keep coming back to. I seem to get on really well with the Selle SMP Forma saddle, but, if I’ve been testing something else and put my trusty SMP back on in slightly the wrong position, or at a different angle that what I prefer, then it doesn’t feel good. I know this is a good saddle for me, as when it’s positioned correctly, it just melts away. However, if the position of the saddle in space relative to the other two contact points (feet & hands) is somehow off, that’s when I run into trouble.
So, if it might not be 100% the fault of the saddle shape that’s causing the discomfort, what could it be? Let’s get into it, in the order we go through things when we’re doing a fit in the studio.

Shoes, Feet and Cleat Positioning
I can’t remember the last time I did a bike fit and didn’t need to adjust some element of how the foot interacts with the shoe and the pedal.
How the shoe fits a rider’s individual foot shape, how the foot is supported inside the shoe via appropriate arch support and wedging, and where the cleats are positioned in relation to the foot structure can have a huge impact on saddle comfort. Overall foot function and intrinsic strength can also have a big part to play.
If the foot is not adequately stable and supported inside the shoe, whilst attached to and pushing on the pedals, then that can impact how the body stabilises itself whilst on the bike. If there is a lack of sufficient stability at the foot, then this will likely be compensated for by the next closest contact point, i.e, the saddle.
We ideally want the majority of our weight to be supported on the bike through our feet, as this is how we support ourselves when standing / walking on solid ground. If we have good proprioception through the whole of the foot, and can sense the “ground” – in the case of riding a bike, the shoe / pedal interface becomes our ground – then this relaxes our central nervous system and allows us to access better posture, muscle recruitment and to better create stability and transfer force through the bike. It also puts less demand on the interface between the saddle and the pelvis structure as the main stability / weight bearing point.


Saddle Height
Once we’ve got the interface between the feet, shoes and pedals in a good place, the next thing to get right is the position of the saddle relative to the feet.
The first element of this is saddle height.
One of the most consistent mistakes that riders make, and we see this all of the time in the studio, is not having their saddle height positioned appropriately – it’s almost always too high.
If the saddle is too high, then we can’t load the foot adequately right the way through to the bottom of the pedal stroke. The stability to support yourself on the bike needs to come from somewhere, and if it’s not the foot, then it usually ends up being the saddle.
Think of a see-saw in a park; if your friend leaves you hanging at the top with your legs dangling freely in mid air, what’s taking the weight? Yep, you guessed it…
What we’re ideally looking for with saddle height is control. Control of the push phase all the way through to the bottom of the pedal stroke. If the saddle is too low, you’ll smash your knees and quads to bits, and you’ll feel like you’re pedaling through a river of treacle. You might also experience some lower back pain and hip discomfort at the top of the stroke. Too high, and you’ll lose connection and contact towards the bottom of the stroke – pedalling will feel disjointed and “choppy”, you might end up with some hamstring issues, numb feet and you’ll also likely feel more pressure on the saddle in places where we really don’t want it.
If you want a comprehensive guide on how to set your saddle height, and the method that we use to do it, you can find it here…


The Cockpit
Once your saddle height is in a good place, it’s time to turn your attention to the front end of the bike. The most common pitfalls we see here in relation to saddle comfort are; a handlebar stack that is too low and/or a handlebar reach that is too long. Neither are good on their own, but put together, they’re a one way ticket on the fast train to a festival of pain.
Both a front end that is too long, too low, or both usually causes the rider to support their weight more towards the nose of the saddle, rather than sitting back into the wings towards the of the saddle, where the largest amount of stability can be found. Without stating the obvious, generally speaking, the nose of the saddle provides less support than the rear of the saddle. It’s a game of force over area.
If the handlebars are too far away (in terms of reach) the rider may scoot forwards onto the nose of the saddle to try and shorten the distance between where they sit and where they place their hands. This can place more pressure on the soft tissue, rather than contacting the saddle through the pelvic structure. Bone is designed to take weight, soft tissue is not.
If the front end is too low (in terms of stack height), then oftentimes, a rider will have to rotate their hips beyond their comfortable range, placing all of the force on the smallest and narrowest part of the pelvic structure, and more often than not, creating excessive pressure on soft tissues in the process.
These are just two examples of how a poorly set up handlebar position can greatly impact saddle comfort. The opposite (handlebars too short and / or too tall) can also adversely impact saddle comfort – we also see this regularly in the studio.


Crank Length
This is a big one, and unfortunately, a difficult one to test without doing a bike fit.
It’s been all the rage in the last couple of years for riders to start experimenting with shorter cranks, but bike fitters have known about the many benefits of riders riding a proportional crank length for literal decades.


What do we mean by proportional crank length? Well, in nutshell, a proportional crank length is a length of crank that doesn’t cause the rider to make any unnecessary compensations to clear the top of the pedal stroke, cause suboptimal muscular biases to generate power and cause the rider to adopt poor posture and lose stability on the bike.
Cranks that are too long relative to a rider’s functionality probably contribute in some way shape or form to almost every discomfort on a bicycle. Bold claim, I know. But, in the context of our discussion around saddle comfort, seeing as crank length directly influences how the hips function, it can have a huge impact on how a rider perceives the contact with the saddle.
Without going into too much detail here, if the crank length is too long relative to the amount of flexion a rider can deal with at the top of the pedal stroke, some of these common compensations can happen.
- Excessive hip rock
If a rider has to excessively rock their hips from side to side in order to create enough space to clear the top of the pedal stroke, the friction this creates as the skin, chamois and saddle brush against one another may result in the rider experiencing saddle sores.
- Excessive hip rotation
Similar to hip rock above, if there is excessive hip rotation (a forwards / backwards motion of the hips as the rider pedals) then the friction generated can again result in saddle sores.


- Hip drop and/ or hip hitching
This can create an asymmetrical or heavier contact on the saddle on one side, where the rider usually subconsciously decides to preference, or prioritise one side of the body that it wants to try and make feel best. This is usually the rider’s dominant side, and can result in excessive pressure on the one side of the saddle / pelvic structure, and/or saddle sores, usually more on one side, as there will often be more movement on one side of the pelvis compared to the other as the rider tries to compensate.
- Posterior pelvic tilt
If a rider’s way of compensating for a crank that is too long is to position the pelvis into a more relative posterior pelvic tilt (i.e, tucking the pelvis backwards, underneath the torso), then this can often result in excessive pressure through the pelvic structure, or ischial tuberosities / sit bones.
Usually a rider adopts this posture (which looks like your classic “prawn” or “shrimp” posture) to try and relieve pressure on the soft tissue, as they don’t want to rotate their pelvis forwards in order to cover distance from the saddle to the bars. The kicker comes by way of every time the rider crests the top of the stroke, they effectively exaggerate the rearward “tuck” of their pelvis, placing pressure on the lower back and slamming their pelvis into the saddle. This can present as a “bruising” feeling or sensation, and can take a while to settle down.
So, how do you know if your cranks are too long? Without testing different cranks lengths and making all of the necessary adjustments to the position that are required as a result in a bike fit, it’s difficult.
One quick test that can certainly give you an idea if exploring a shorter crank length further might be a good idea, and can be done easily at home, is the backwards pedalling test.
This is best done when the bike is attached to a turbo trainer, as this takes away any need to create your own stability, but it can also be done lent against a wall.
Adopt your regular riding position, hands on the shifter hoods and unclip one foot from the pedal, leaving that leg dangling freely. Now, very slowly – the slow part is important – you’re going to pedal backwards with the leg that is still attached to the bike. What we’re looking for is to see how smoothly the leg passess over the top of the pedal stroke at peak flexion.
The idea is to see if the smoothness with which the leg completes a full revolution of the pedalling circle is consistent. If it is, and there is no pinch point at peak flexion, where the femoral head cannot move freely inside the pelvic acetabulum at the top of the stroke, then its likely that there is enough range of motion for the body to deal with the amount of flexion required to crest the top of the pedal stroke smoothly.
If however, there is a sticking point as the leg comes into peak flexion, where the speed of the rotation is temporarily slowed even further or halted, and then a sudden acceleration once the top of the pedal stroke has been navigated through peak flexion, then it’s likely that a shorter crank may be needed in order to smooth out this transition, and reduce any consequential compensations that may occur as a result of the body having to deal with more hip flexion than it can handle.
It’s a bit of a ghetto test, but it can give you a very good idea as to whether further exploration and experimentation with shorter cranks might be a good idea.
Assuming your crank length is good, and there are no unnecessary compensations happening in order to deal with excessive hip flexion, THEN we can start to test saddle shapes, and finally weight distribution (saddle fore/aft and handlebar fore/aft relative to the feet).
Saddle pressure mapping
Ahh, tech! Saddle pressure mapping unfortunately isn’t going to magic all of your problems away, but can be a useful tool, if used in the right way, for both riders and fitters to visualise how the rider is interacting with the saddle. It can help demonstrate what effects (quantifiable through rider feedback as positive or negative) any changes to the position, or using a different saddle entirely, might have as to how the rider is creating contact through the pelvic structure and the saddle.
This can be very informative when testing non-saddle related positional changes, showing riders how each different part of the bike works in conjunction with one another to create the overall rider experience. One thing changes, and it can change everything else.


Next Steps: No Pain, No Gain?
Once your overall bike position is in a good palace, then we can start to look at different saddle shapes.
One of the reasons we do this very late in the process is that we want to isolate the saddle that we’re testing but making sure that the rest of the position remains constant. This way, we can compare different saddles objectively to come to a considered conclusion. If there are other variables also at play, then this can murky the waters and create doubt and confusion as to why a certain saddle feels the way it does.
I’m not going to get into the weeds about saddle shapes here, as this article is already long enough and that topic deserves its own spotlight.
What I hoped to highlight however is that when looking to explore and alleviate saddle discomforts, it often pays to look at the bicycle system as a whole, rather than just blaming the component most closely associated with the site of the acute pain.
Oftentimes it is a combination of poor bike positioning and an inappropriate saddle that is the root cause of the problem, but before launching down the endless rabbit hole of trying every saddle under the sun, take some time to ensure that the rest of your bike position is in a good place. You’ll likely unlock some more comfort, stability and as a result, power by getting the basics right. Once you’ve done that, you can really hone in on where the pinch points actually are. It might not be the saddle after all…
Words by Mat (one ‘t’)
If you’ve made it to the end of this article, thank you and we hope it’s been useful for you. We’d love to know your thoughts!
If you have any questions on your bike buying journey get in touch, we’re always an open door and there’s no such thing as a silly question: info@foundation.fit
If you’re looking to take ownership of your bike fit, book a session with us HERE